How To Build a Cold Frame
POP Projects is a collection of new and classic projects from more than a century of Popular Mechanics. Master skills, get tool recommendations, and, most importantly, build something of your very own.
Spring is still many weeks away, but you can get a start on a bountiful summer garden by building a cold frame now, in the depths of winter. It’s a simple carpentry project that takes advantage of passive solar heating to effectively turn the calendar ahead.
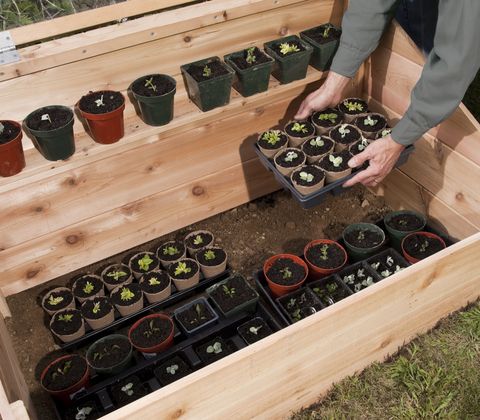
Essentially, a cold frame is a miniature greenhouse—a bottomless box with a clear lid that captures sunlight, insulates plants, and warms the soil. Lynn Ocone, a gardening expert and an author, uses her cold frame every year at her home in chilly Burlington, Vermont. “Long before spring arrives, I start plants indoors under grow lights and then move them out to the cold frame after the last of the hard frosts,” she says.
Ocone has two recommendations for late-winter or early-spring gardeners. First, position the cold frame with its clear lid facing south. “A south-facing cold frame captures the most solar energy and helps keep plants warmer longer,” she says. Second, make it light enough to be portable. “Most people put a cold frame in one spot and never move it, which is fine,” Ocone says. “But occasionally it’s nice to be able to move it into the garden and start the plants right in the soil.”
These Tools Will Help
Plans and Materials
Cutting the Parts
The body of the cold frame I built for my own backyard is made up of tongue-and-groove red cedar 1 x 8 lumber held together with screws and vertical 1 x 4 cedar battens. The material is lightweight and naturally resistant to rot and bugs. The lid is 2 x 2 cedar, grooved to accept a clear acrylic plastic panel.
I started by using a power miter saw to crosscut 1 x 8s for the two side panels. For each panel, I cut three 30-inch-long 1 x 8s and one 15-inch 1 x 8.
Next, I used a table saw to rip off the groove from the bottom edge of two of the 30-inch-long 1 x 8s, but you could just as easily use a circular saw. Those groove-less pieces serve as the bottom panel on the sides. Then I formed each side by tapping together three 30-inch 1 x 8s, topped with one 15-inch 1 x 8.
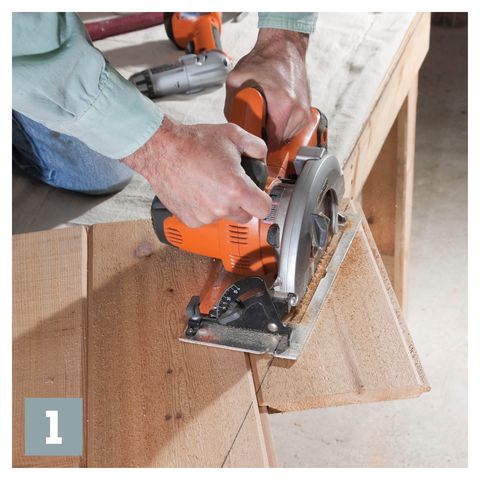
Next, I attached two cedar 1 x 4 battens to the inside of each side panel using waterproof carpenter’s glue and 1¼-inch galvanized decking screws. It’s important to position each batten 3/4 inch from the edge of the sides. That recess accepts the front and rear panels. I then trimmed each side panel to 25 degrees with a circular saw.
I cut six cedar 1 x 8s to 46½ inches long for assembling the cold frame’s rear and front panels. As with the sides, I started by ripping the groove off two 1 x 8s, but I also bevel-ripped the tongue off two other 1 x 8s to serve as the top boards. They provide a sloping edge for the lid to rest against [1].
Assembling the Cold Frame
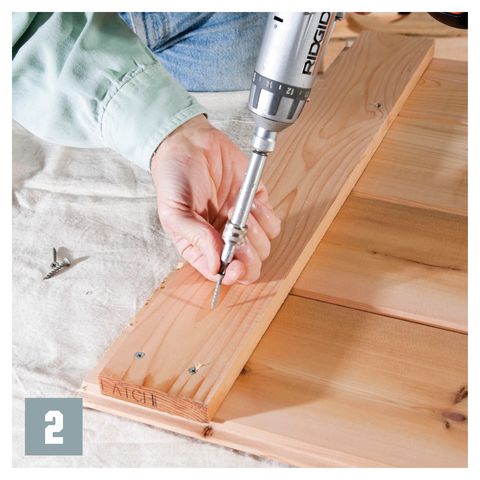
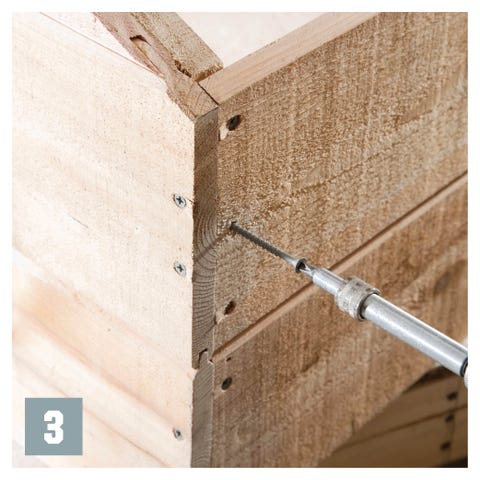
I began assembly by using 2-½-inch-long decking screws to fasten the two front boards to the side panels. I drove screws through the front of the boards and into the edge of the 1 x 4 battens [2]. I also drove screws through the side panel and into the ends of the front-panel boards. This double-direction method creates an incredibly strong, long-lasting corner joint [3]. The same technique was used to attach the rear of the cold frame to the side panels.
With the body of the cold frame completed, I screwed the hinge cleat to the rear panel [4]. The top edge of this cleat is sawed at an angle to match the sides, and the lid hinges are screwed to it. Then I cut two small shelf cleats and attached them to the rear batten. By placing a small 1 x 4 shelf between the cleats, I can fit another row of plants into the cold frame, increasing its storage capacity without unduly shading the plants below. It’s a simple trick that a first-time builder may overlook.
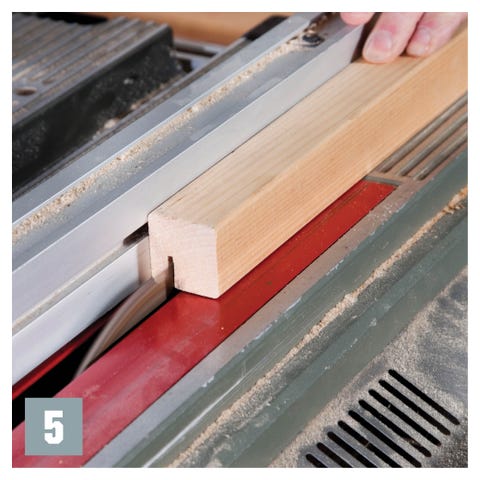
Next, I began work on the lid by cutting cedar 2 x 2s to length. Using the table saw, I cut a 1/8-inch-wide x 5/8-inch-deep groove into the two side pieces and top rail [5], but not into the bottom rail. It’s important to note that the grooves aren’t centered on the 2 x 2s, but instead are positioned 3/8 inch from the top surface.
I then ripped the bottom rail to 1 inch thick, and here’s why: Making the bottom rail thinner than the other parts allows the clear acrylic panel to overlap the bottom rail. That way, rain will cascade right off the lid without damming up against the bottom frame member. Not only would that puddle eventually rot the lid’s bottom rail, but it also could cause a leak at that point–and then the dripping water might damage the plants inside.
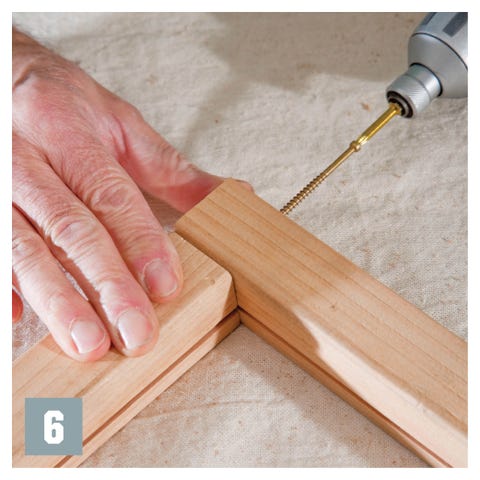
I fastened the lid parts together with a pair of 2½-inch trim-head decking screws at each corner joint [6]. I bored pilot holes, to avoid splitting the 2 x 2s, and reinforced the lid with a 3 x 3-inch metal bracket in each corner. Next, I squeezed a continuous bead of clear silicone adhesive into the grooves in the frame parts and across the upper surface of the bottom rail. I slid the acrylic panel into the grooves until it was flush with the bottom rail, and then clamped it and allowed the silicone to cure overnight.
Finishing Up, Digging In
I fastened the lid to the cold frame with two 3-inch galvanized butt hinges, each of which was attached to the beveled back cleat. I then set the lid onto the cold frame and screwed the hinges to the cleat.
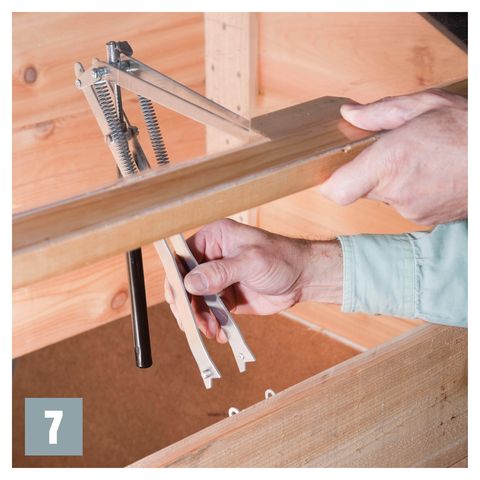
A cold frame is designed to protect plants from the cold, but the interior can get so hot that the plants will die. The most common way to avoid this problem is to simply prop open the lid with a stick. However, a more convenient way to ventilate is with an automatic cold-frame opener, which automatically raises the lid when the temperature inside gets too high [7].
The opener has a liquid-filled piston that expands when warm and contracts when cold, opening and closing the lid in the process. It can be adjusted to expand at any temperature between 60 and 140 F. It has a lifting capacity of 15½ pounds and will open the lid up to 18 inches high.
With the opener installed, I dug the cold frame into the lawn against a south-facing stone wall. The wall provides a little wind protection, but I still dug down about 4 inches to keep the wind from blowing in from underneath and to increase heat retention.
Then I started adding plants. It’s a satisfying feeling on a chilly day to put your next crop into a cold frame. Spring doesn’t seem so far away after all.

